SCRUBBED! – For Safety Reasons, this session has been cancelled
This is the third of about twelve snowshoe events I will be running for EBTC. The weather forecast is VERY WARM, -1C with light winds.
The Objective
Snowshoeing on a variety of terrains including through the trees.
How did the snowshoer crossed the road? (Answer, carefully).
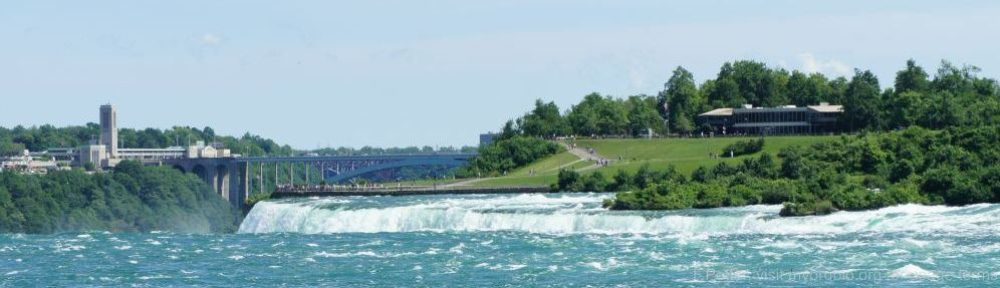
Enjoy the legislature lights before they are taken down; bring your camera!
Where are We Going and How to Get Back
Meet at the skate shack at the SOUTH end of the legislature grounds (look for an ATCO trailer topped by a giant snowman); if you need an address try: 9515 – 107th Street Edmonton.
We will remain on the south lawns of the legislature grounds, don’t worry though – lots of adventure awaits!
South Legislature Grounds
What to Take
Snowshoes (duh!) and poles (optional).
Clothing appropriate to the weather. Noting that I tend to run hot, I am plan to wear/bring:
Hiking boots
Lightly insulated shell pants
Long sleeve cycling jersey and a cycling shell (shell is shelved fairly quickly)
Fleece neck warmer
Cycling beanie and/or a baseball cap
Full fingered cycling gloves
Headlamp (generally these will be off but just in case we need them).
I have no problem recommending the first two choices (a long ago former employee of the first and long standing member of the second). No history with the third.
I have no problem recommending the first two choices (a long ago former employee of the first and long standing member of the second). No history with the third.
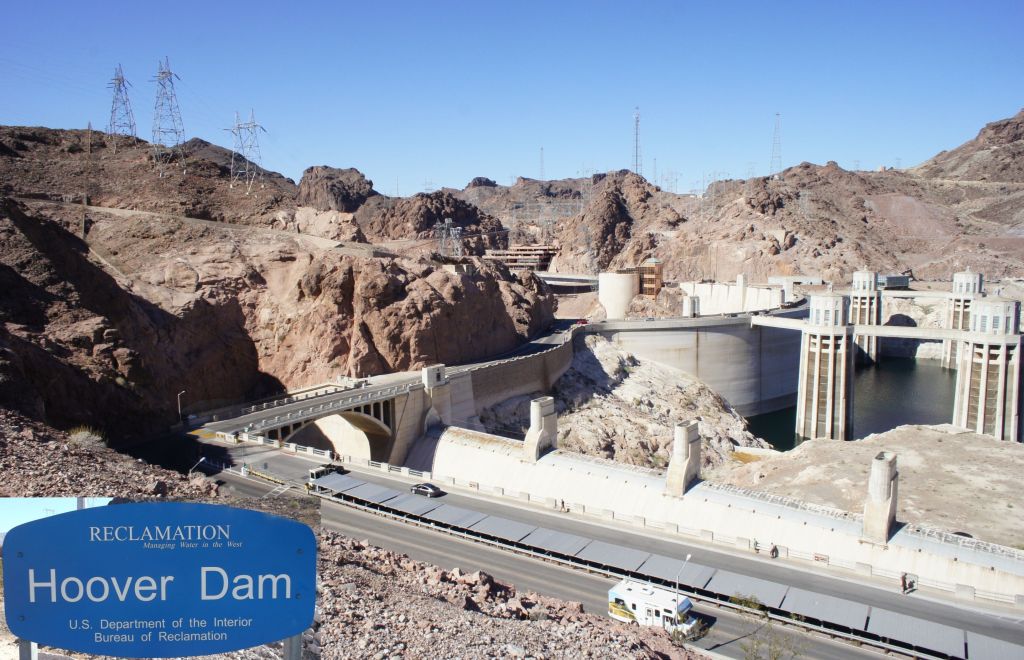
Visiting Hoover Dam has been on my bucket list for a long time. In fact, after visiting Vegas in 2010, I said that I have only two reasons to ever return: visit the dam and hike the desert. On this ride I got 50% of my reasons to return.
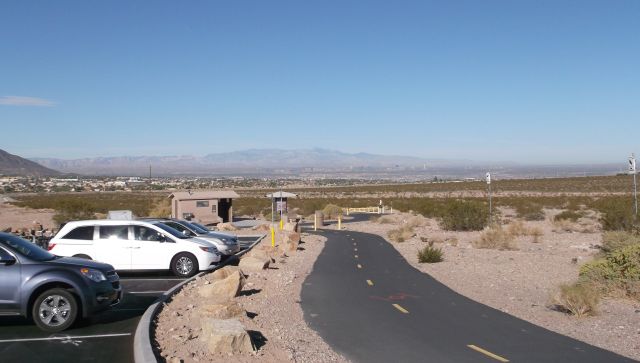
Located near the Clark County Museum (a reference only fans of Pawn Stars would get); this is a large parking area in the 8-o’clock position of the River Mountains Loop Trail. As it turns out, it is also a relatively high spot on the trail (635m) given the descent we experienced and the grinding ascent later in the day.
2014-10-31 – Equestrian Staging Area
Descent Into Boulder and the Dam Ride
Riding clockwise along the River Mountain Loop, our general direction was toward Boulder Nevada. The descent into the Hoover Dam saw a loss of more than 150M down to 387M at the top of the Dam. En route, a section of the trail doubled as a flash flood spill way (aka skate-board turn pike).
2014-10-31 – Descent into the Hoover Dam via the spill way (aka turnpike)
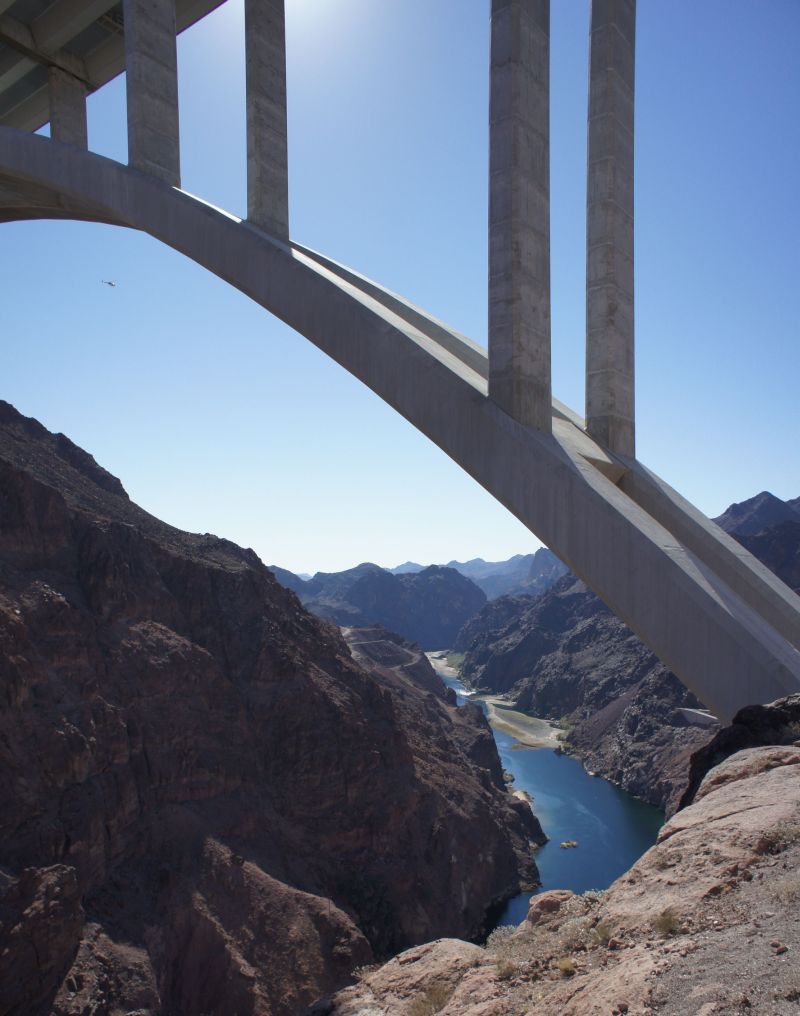
The actual descent toward the dam included by-passing the new bridge, clearing a security check point and seeing the US-federal government fineness pull over a seemingly innocent looking car. Both the ride and K-9 units were quite exciting.
2014-10-31 – The New Bridge
2014-10-31 – Descent and the K-9 Unit
2014-10-31 – From the Arizona Side
Ascent Out of the Dam – the Climbing Begins
For every descent, there is usually an ascent; and despite delaying at dam level, we began to make our way up again. Fortunately a parking garage and elevator shaved five-stories of climbing off of our return to the River Mountain Loop. Unfortunately the rest was either ride or push; including the initial ramp from the parking garage to the Tunnels Trail.
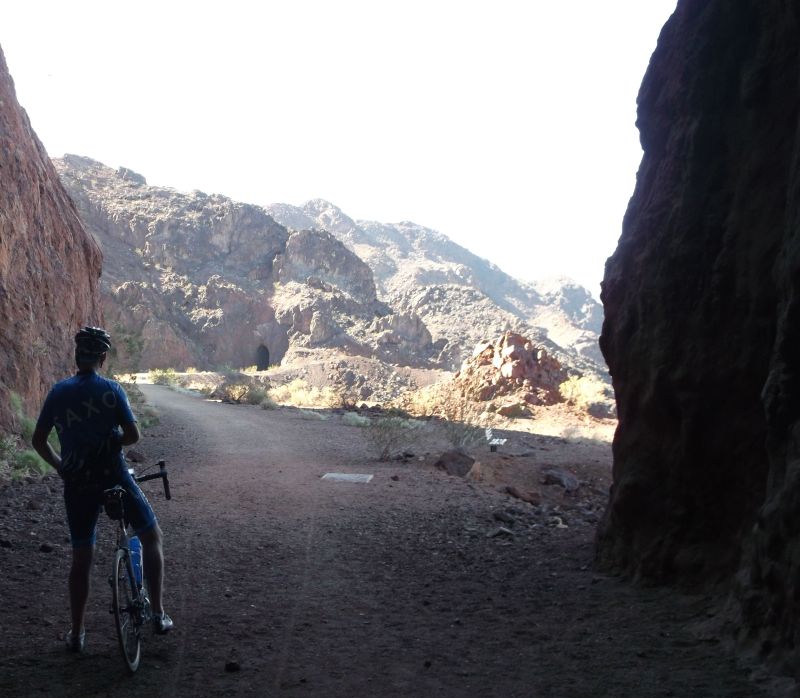
… the gravel Historic Railroad Tunnel Trail hugs the hills on the southern shoreline of vast Lake Mead. The rail-trail offers panoramic views of the manmade lake and snakes through five railroad tunnels on its way toward Hoover Dam. After the dam was completed in 1935, the railroad ceased operation, and in 1962 the tracks were removed; the trail opened in 1995.
Riding on the rail way bed was fun but we were glad to be descending rather than trying to climb through the loose gravel. Five tunnels give a brief respite from the heat and vistas down to Lake Mead were around most corners.
2014-10-31 – Leaving one Tunnel and Starting Another
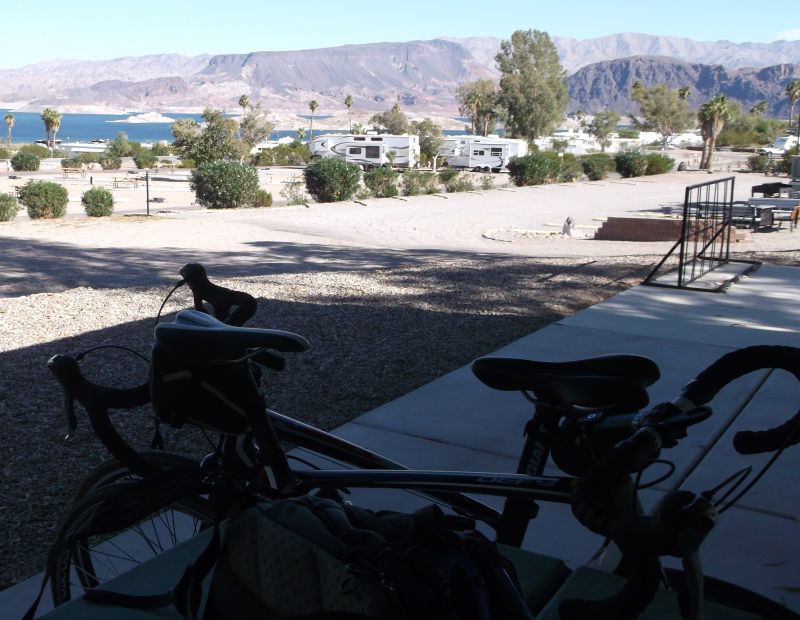
A quick snack at the campground just off the River Mountain Loop Trail brighten our spirits, fluids and energy levels. Little did we know how much we would need of all three over the next few hours.
2014-10-31 – Lake Mead from the Campground
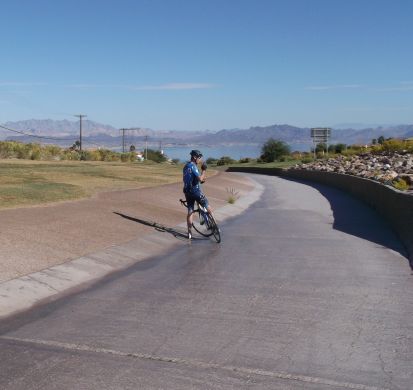
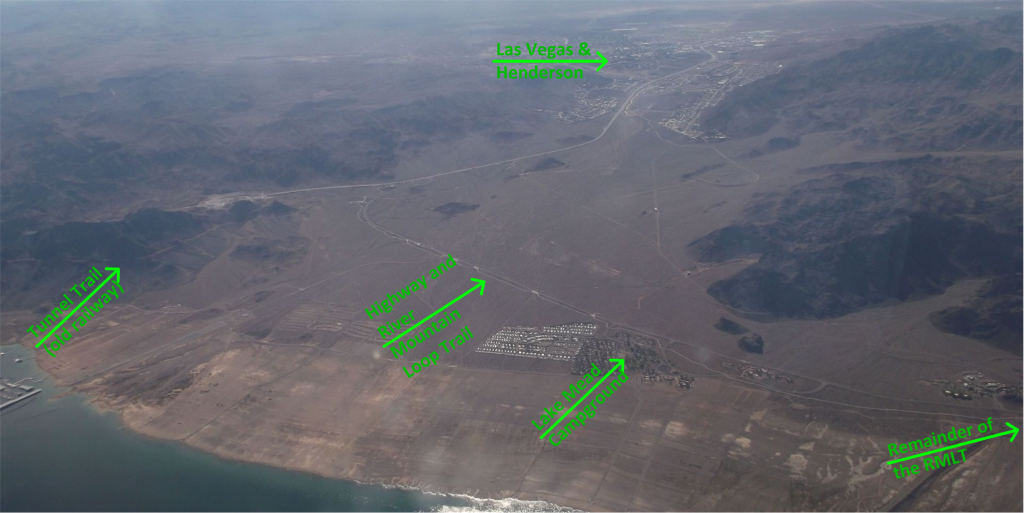
River Mountain Loop Trail
After the campground, civilization quickly fell away (well except for the excellent asphalt trail we were riding on) to be replaced by desert vistas and rocks. Also making its presence known were long hill climbs up and out of the Lake Mead valley. Making the effort more challenging were the +30C temperatures which saw water being sweated out faster than it could be consumed.
2014-10-31 – The Desert and the Ascent
Completing the River Mountains Loop Trail
Six hours, about 4 litres of water and 74+ km later, we returned to our starting point. Dehydrated and exhausted – we still had enough energy to hit the Vegas strip during a very crazy Halloween Night. Supper at Gordan Ramsay’s Burgr Bar and stroll afterwards capped off an excellent day of riding and bucket list kicking!
I started writing trip logs (a much more manly term than scrap booking) on adventures about 20 years ago. I have tried a few different formats such as a log book, word document, and a desk top publishing tool. Given that I have yet to re-read many of the trip logs, perhaps a blog is way to go as a method to remember where I have been and what I did once I was there.
By way of a note to myself, because this blog will be available on the www (including to spammers and nasty people who visit my site); I have purged most personal details and tried not to post too many pictures showing faces, focusing on landscapes instead. Look to Facebook and secure to see more personal content.
With these caveats in place, here it goes, my first blog-trip-log!
Cycling Vegas – an Overview
Las Vegas, sin city is also Spin City. Unknown to many visitors, Las Vegas and environs is a cycling destination. Beyond the Strip, bike lines, canyons, the Hoover Dam and desert vistas await. The Edmonton Bicycle and Touring Club (EBTC) ran a 5 day event that combined 3 days of riding and a bit of what Las Vegas is best known for. The trip left on October 30, 2014 with a November 3 return. Using a hub/spoke model from the Green Valley Ranch in Henderson Nevada (GVR), this trip was an intermediate ride meaning a moderate level of physical condition and cycling experience.
The trip details are available and Frank’s Packing List – Vegas 2014 for the trip are provided (mostly) for my future reference and so I don’t need to go and find that lost log book of adventures.
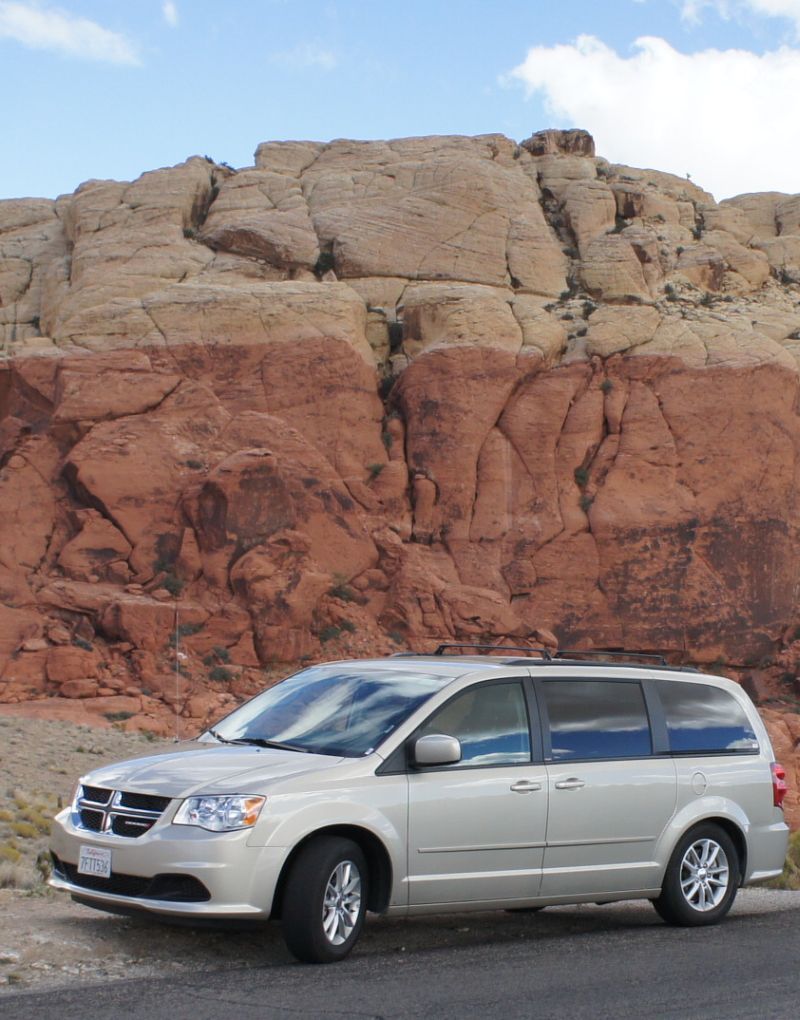
Billed as an EBTC ride, (un)fortunately, only the two organizers, Frank and G., signed up. They travelled to Las Vegas via West Jet on October 30 and picked up their rental van. As a turns out, the Dodge Caravan was a great investment as it both permitted transportation and a safe place to stow the rented bikes.
A great place to stow bikes and cruise the Vegas strip.
The bikes were were rented from J.T.’s Bicycles in Henderson Nevada at a cost of about $150USD for each – which included an emergency repair kit (tube, multi tool, C02 pump) and putting on the pedals and saddles that we had brought with us.
2014-11-02 – Our Trusty Steads
Both G. and I liked the bikes although the smaller frame and bent handle bars took some getting used to on my part. I was hoping for a third granny gear on the front sprocket for hill climbing but was this was not available. As a result, G’s powerful lungs carried him to the top of the ascents where as I huffed and puffed my way up, typically having to traverse the trail or road to reduce the hill slope.
With bikes, a van to store them and place to sleep (read on for my Tripadvisor.com review of GVR) – we were ready for our first day of adventure, Hoover Dam. But where to cycle, time for a quick overview of riding in Vegas.
Riding in Vegas – An Overview
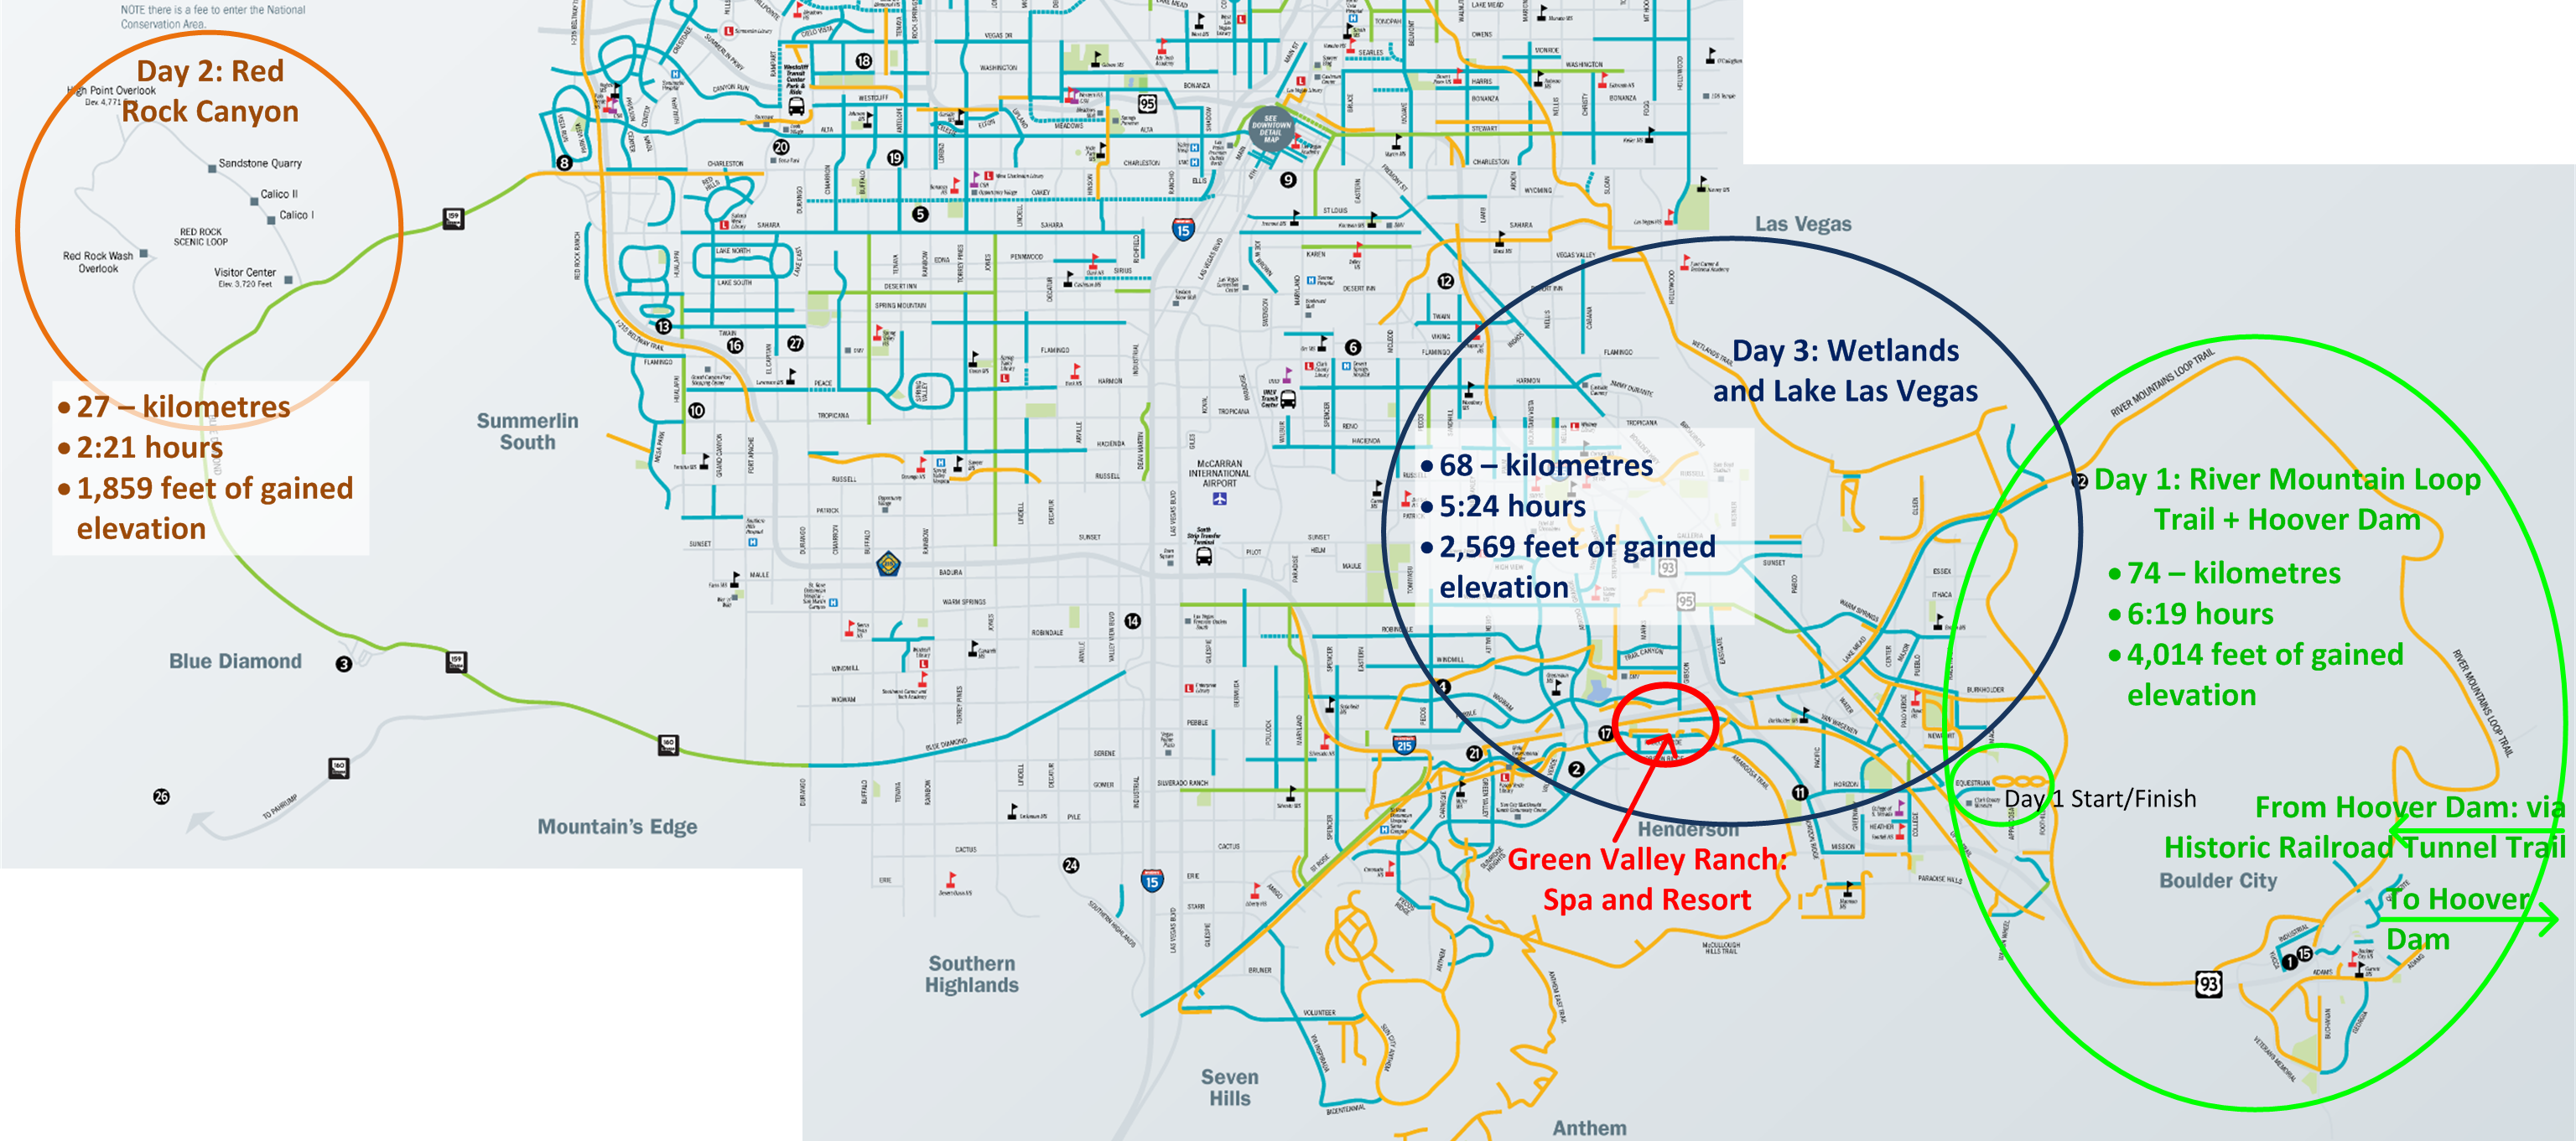
There are a LOT of bike and shared trails in and around metro Las Vegas. I looked for an exact number (and could not find it) but did discover, there are lots. This trip focus on three different sections of these trails: River Mountain Loop, Red Rock Canyon and the Wetlands/Lake Las Vegas.
Three Cycling Days – 2014 Las Vegas
G and I rode primarily in the eastern portion of the metro-Vegas area with the exception of Day 2, Red Rock Canyon. There are still lots of the bike trails to explore including numerous Rail to Trail routes. It looks like my bucket list just go bigger!
Day/Date
Ride
Distance and Elevation
Day 1: October 31
Hoover Dam and the Loop
74 – kilometres
6:19 hours
4,014 feet of gained elevation
Day 2: November 1
Red Rock Canyon
27 – kilometres
2:21 hours
1,859 feet of gained elevation
Day 3:November 2
Wetlands and Lake Las Vegas
68 – kilometres
5:24 hours
2,569 feet of gained elevation
Totals
169 – kilometres
14:04 hours
8,442 feet of gained elevation
OK priced, clean, safe and very far sans auto
Trip Advisor review of Green Valley Ranch I stayed at GVR for a 3-day bicycling holiday over the 2014 Halloween weekend; so yes, there is more to do in Las Vegas than gamble away your kid’s college fund. Assuming that you have a vehicle or that you plan to spend the entire trip depleting your child’s educational future, GVR is a good location for accessing points throughout Las Vegas due to the proximity of the freeways.The hotel was clean and grand in that Las Vegas faux reality sort of way. The staff were all friendly with nary a grump in the bunch (even the tie and jacket security guys would give you a nod hello). The pool would keep the kids entertained for a few days and there is a small garden beyond the pool in which the freeway noise is only a low throbbing. I did not see any signs of soccer, a playground set or the like – so other than the pool, GVR is at best neutral on the kid friendliness scale.Keep this scale in mind if you don’t have a rental car because you are otherwise kinda stuck at GVR. There are some high-end shops nearby but the expect to cab, drive (or bicycle) to a nearby non-trendy grocery or drug store.In side the casino there is a food court that seems surprisingly over priced. The buffet is a good value, at least for the two breakfasts we head there. $8 for all you can eat with a good variety and quality short beats a $20 cab ride for a box of corn flakes.Overall, GVR seems to occupy the market space between the fancy strip hotels and the low-mid econo-casinos that dot Vegas.Overall, I rate it “OK priced, clean, safe and very far sans auto”. Stayed November 2014, travelled with friends
Cycling & Leadership; ‘Beat Phrank’: how to keep a cycling group together when it has disparate fitness and speed levels. Or, when leading a team with different abilities how to maintain group cohesion and supporting individual goals.
Full Disclaimer: I am not an expert on cycling. I have never raced, mountain biking seems like too much bother and I don’t ride in -40C. Nevertheless, I am passionate about cycling because it has allowed me to see things and meet people in contexts that generally promote conversations, beer drinking and long-term memories (okay, the last two sometimes clash). Before reading on, insert the standard caveats about checking with a physician before starting a physical exercise program. This blog is not intended to replace medical advice. Use at your discretion and always employ common sense.
Maneuvering a bike over an unusual bridge crossing the Wienfluss (river) just outside of Vienna Austria.
I like to share this passion and I have run ride programs. One individual from a program asked the question about whether she bought the right bike and why she seems to be so slow. I responded in email but to help to thwart the eventual hardening of the brain cells (too much cycling and eventual beer drinking), I thought I would throw the advice out here to for public consumption. Feel free to weigh in (but please correct me gentle).
The Three Things to Keeping Up with the Group
Riding with a club gives you a chance to see the super-duper triathlon types and the newbies who simply want to keep up. This advice is more for the newbie in which 40km seems daunting and 80km or more seems impossible. So, to keep up with the group you need to focus on three things: physical conditioning, equipment and technique.
Physical Conditioning
Guess what triathletes, you have this one nailed! In the other corner are folks like me who discovered a winter bulge where one did not exist last fall (or at least I was better at ignoring it). To ride with a group, the better fitness level the better but most people who can walk for a few hours, climb moderate hills, etc. can do well on short to moderate (40-80km’ish) rides. So even if you have mystery winter bulges, carry on to the next two things.
Well Maintained Equipment
To bicycle you need, well, a bicycle. Myself I tend toward the touring hybrid variety as I like to carry stuff in panniers (saddle bags), water bottles accessible while riding and fenders for my commuting bikes. Like anything in life, the more you spend, the better quality you get and the less you will experience in break downs, etc. A reasonable starting price for a new hybrid is about $500 and a good one can be had for the $750-1,000 mark. If you are now experiencing sticker shock, remember how much a golfer pays for a good set of clubs. As for where to buy, MEC is a good starting point or any local bike shops (a plug for my local shop, Crankys in St. Albert). My experience is avoid department stores, chains or anywhere where the mechanic looks like a high school student working part-time.
Alternatively buy a very good used bike. Pay a bit of premium by buying it through a reputable bike shop or a club sponsored bike swap, such as this one – bike swaps.
A word of caution though, bikes are like mushrooms, before you know it your one bike will soon be 2, 3 or more!
Buying the bike is only the beginning, maintaining it is even more important. Bikes are remarkable bits of machinery, they can be forgiving but when the fail – they generally do so as far from home as possible. As a result having some basic knowledge is critical. In particular you should know how to: change both tires (front and back), wash your bike, clean and lubricate a chain and do basic lubrication of the bike. Adjustments, bearings, etc. I leave to my friendly bike shop. If you are like my wife, you can also leave everything to your husband.
Okay, you are at least minimally fit and you spent your kids college funds on a new bike – now you can keep up, right? Maybe but probably not. Cyclists are generally a lazy lot who like to get places while spending as little energy of their own energy as possible (and looking dazzling in spandex). As a result, the following six techniques are critical.
Technique number one, cycling is about RPMS, not torque. You may have seen the big guy grinding his way up a hill while a petite young lady zips past him. If you have, you have seen the difference between revolutions per minute and torque. When riding, you want to ideally be spinning the pedals at the same cadence (revolutions per minute) and with the same effort (light, think of gently kicking a soccer ball to a 3-year old) whether you are on the flat, the up or the down hill. To do this, you must know how to use your gears so that your cadence and torque can remain consistent.
Technique number two – be kind to your delicate bits. Get a comfortable saddle, riding shorts and then take the time to let your more delicate parts get used to it. ‘Time in saddle’ is something you have to do each and every cycling season.
Technique number three – Learn to post. Post means getting up on the pedals and riding for a distance with your delicates hovering over the instrument of torture. Posting a few times an hour (or thereabouts) allows the blood to flow back to the pelvic floor and other nether-regions (not to be confused with the Netherlands).
Technique number four – pedal baskets or shoes. There is only one point of energy transfer between you and the bike – the pedal. The conventional pedal is a mediocre connection device as most of the force is only spent in the 1 to 5 o’clock position of the down stroke. With baskets, shoes, etc, the energy transfer is possible through the entire rotation. As a bonus, posting is alot easier with your feet attached to the pedals.
Technique number five – jettison weight. I have to admit, I have a hard time with this one as I like to carry tools, extra water, a snack, a second camera, clothing (well you get the idea). Unfortunately every gram of weight has to be paid for by your effort. If you can leave stuff (and winter-bulges) behind.
Technique number six – Hydration and Nutrition. Thanks to Joe who provided the advise below. My own rule of thumb is to only snack on rides (e.g. no big lunches) and lots of fluids. Joe’s advice is even more targeted:
Proper hydration and nutrition come into play long before you get thirsty or hungry. Start when you leave the parking lot and take a sip every 15 minutes, consider a quality sports drink or easily digestible carbs to conserve your glycogen. Do not eat at least 2 hours before the ride starts, since it takes that long to stabilize your blood sugar, otherwise the insulin will rob you of energy at the start.
Ride, Ride and Ride
Finally, like anything else, get out there and ride. Not only will it reduce your winter surprises, give you time in saddle – you will also get to meet interesting people, go places – and hopefully drink some beer.
Thanks to Other Contributors
Garet H, reminding me about the benefits of posting and Greg P. reminding me about my weight (errr, carrying weight) and Joe M. about hydration and nutrition.