
A memory jog about the effort behind organizing and then editing the video for a ninety-minute webinar on grant management. Lessons learned from their self-taught journey, emphasize time-intensive editing processes, and highlight the minimal audience engagement expected. A written summary is a more efficient and effective alternative.
- Webinar’s Make Good Death Marches
- Take a Course, Doofus
- Editing Steps
- Some Starting and Ending Statistics
- Break the Video into Scenes (Sequences)
- UMMMMmmmm and SOOOooooo
- Other Cuts Beyond Ummm
- To Space or Not to Space…
- Overlays and Research
- Assembling the Rough Pieces
- Vetting and Tweak Offers
- Publishing and Promoting
- Death March Alternatives
- Notes and References
A somewhat tongue in cheek reminder of why I avoid video editing. Also, some personal tips in case I am silly enough to ever do it again (which I probably will).
Webinar’s Make Good Death Marches
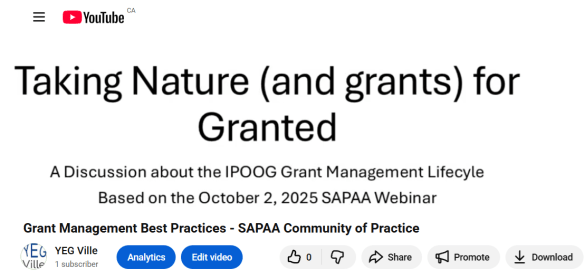
I recently produced a 90-minute online seminar on best practices in grant management. It was a combination of a couple of different interests and projects. The first was to analyze whether an organization, the Stewards of Alberta’s Protected Areas Association (SAPAA), should apply for grants. I am currently the president of the organization and grants are a strategic consideration for carrying on SAPAA’s work.
Next, running a travelogue, YEGVille.ca, videos of my journeys have been a consideration. The webinar resulted in a 55-minute video, and the runtime of the travelogues will be closer to the 60 to 240 second range. What they lack in length, they would need to make up for in quality.
A final reason to edit is as a form of writing. They are a way to capture the otherwise ephemeral results of things like a webinar. I have produced to date a good half dozen such things and never completely happy with the process. So, some notes might help.
Take a Course, Doofus
Being self taught in editing means that I have learned from the very worst. If I do want to do more editing (ARRRGGHHHhhh), a course or certification is likely in my future. In the meantime, the following are some hard won lessons learned for the next webinar [GULP].
Editing Steps
There 10 steps I used to edit this past video and they seem to hold true over my vast video experience. Some of these steps are fleshed out in more detail in subsequent sections.
- Some Statistics. Setting reasonable expectations of how long this will take.
- Capture the Video. Zoom makes this step very easy which is why when I once forgot to hit record it was the pinnacle of DOHH!
- Set Up the Editing Workshop. Have a virtual environment to store and back up the work. I used a combination of OneDrive, Google Workspace (for back ups), and a laptop’s drive (for speed of access).
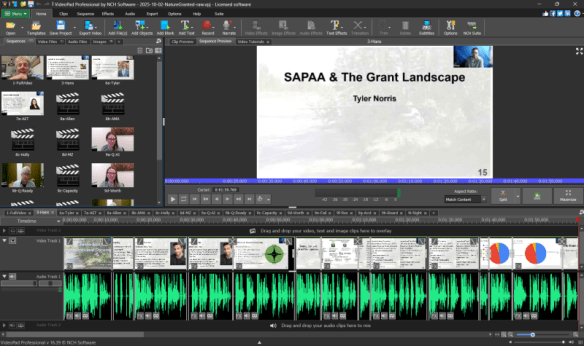
- Select the Video Editing Tool. My son recommended NCH’s Videopad. It is generally intuitive, a bit quirky, and mostly easy to learn. It has some deficiencies particularly around the lack of AI integration (see the ‘UMMMmmm’ section below). Wikipedia lists a few dozen competitors including a nearly as long a list of now defunct tools and companies [1].
- De-Ummm’ing. De-ummm’ing is part of creating an initial rough cut.
- Overlays: Watching a talking head for a few minutes is boring so overlay graphics help to retain retention and add content not provided by the speaker.
- Assembling the Rough Pieces: A rough piece is a single scene from the webinar (e.g. one speaker/topic) and the overlays.
- Final Assembly: A modular approach to this point means the final video is then simply assembled. Through in some filler music and you are done, almost…
- Checking in with the Speakers: This eliminates surprises for them and the double death march of fixing the video after its release.
- Publishing and Promoting: In all likelihood no one will watch the video. With about one video for every person on the planet (various sources), almost no one has time to watch your creation. Of course, if you wrote and published an article, almost no one has time to read it, so don’t fret too much about wasting your time.
Some Starting and Ending Statistics
Rules of thumb or heuristics help us estimate future activities. The following are statistics from this most recent effort and future rules of thumb for future ones.
- Total webinar and video lengths: 90-minute webinar and 56-minute video.
- Estimated Effort Time:
- 40 hours pre-webinar to design, organize, promote, and manage the event.
- 50 hours post-webinar in editing.
- A 3:2 reduction ratio of raw to final; for every raw minute of a webinar expect there to be about one minute of final video
- About 1 hour per minute of final video
- Research includes creating the overlays, for example, looking up a reference a speaker has made and including a web link in the overlay graphic.
- Editing starts with the rough cut (see Ummm… below) and ends with adding in title and credit sections.
- Review time is watching the damn thing… AGAIN! and reviewing with the presenters.
- About 1 hour per minute of final video
- Hosting and Promotion: 1 to ?? hours
- For this video, I plan to promote it on the SAPAA website, my personal sites, and through the sponsoring organizations
- In many ways, this is an article so hopefully those needing the information will stumble across it via a search
- If I aspired to be an internet influencer, then the promotion time would be much greater.
Break the Video into Scenes (Sequences)
Use a modular approach to creating the video. Start with the full rough cut and then create rough speaker scenes. NCH calls these sequences. This prevents corruption of a by isolating each element into a discrete ‘bucket’.
To further protect the time-consuming editing work, I exported the rough cuts as a video in another editing project. Because each of the components in NCH adds to the load time, this also reduces system lag.
UMMMMmmmm and SOOOooooo
We use Umms and filler words in our speech and when listening to someone in real time, they are generally ignored. On a play back, they jump out at you like ketchup stains on a white shirt.
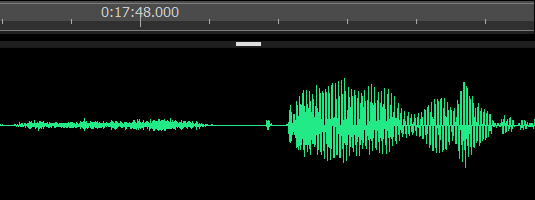
From what I have seen, people come in two flavours: isolated and embedded umms. The isolates are easier to manage as there is a bit of silence before and after the umm. A bit of cutting and presto, they can be made to sound much better. A slight flicker in the raw video feed is the only clue to the excision.
The embedders are a different breed. They merge their umms (or Sooo’s, etc.) into the next word. This means guessing where one sound stops and next starts.
Across seven speakers, I estimate that I cut out about 500 umms. My son, Hans, had very few and only when he was off script. I primarily cut out his inhalations (another distracting voice feature). Other speakers would pepper their speech with the fillers that also include ‘like’ and ‘you know’.
This is an activity I would be willing to pay money for, and I may investigate buying an AI subscription to video editing to do this…. assuming that the robot overlords are smart enough to cut and retain as well as this human (a very low bar has been set!).
Other Cuts Beyond Ummm
After de-ummming the video is deciding what to keep and cut in the final version. Examples of things to cut include:
- Transitions between speakers, e.g.: “…wants to answer that question, …. “
- Speaker repetition, e.g.: “… what I mean to say [and will say it again, adding nothing new]…”
- Social courtesies, e.g.: “I agree with everything the other speakers said, and…”
- Mistakes and miscellaneous.
To Space or Not to Space…
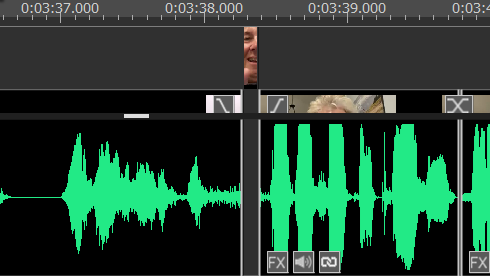
A lesson learned from this go round is to avoid blank spaces in the rough-cut footage. Instead, try to grab 0.3 to 0.7 seconds of video before or after in which there is no audio.
Sometimes a space is necessary to make the cut. If so, then add in a 0.1 to 0.5 second screen capture of the speaker just before the cut. As an online seminar, the audience will forgive the flicker as internet lag.
Overlays and Research
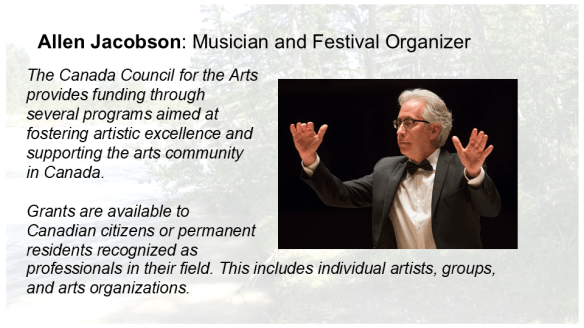
An overlay breaks up the talking head tedium of a video and can add supplementary content. Consider throwing in an Easter Egg or two as the subject matter allows. For a 50-minute video, I spent about a day or so on research. Most of it was fleshing out content the speakers mentioned. In the overlay below, Allen mentioned that he has received two Canada Council grants. This is the overlay explaining who they are and why a grant is prestigious.
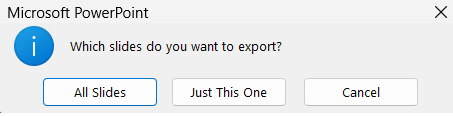
If possible, use Microsoft PowerPoint to export the overlays. File > Save a Copy > [graphic format, e.g. png] gives you the option of exporting one or all of the slides. Google Sheets does not have this option so one will have to export them individually or find an online utility to do the version.
NCH does not import constituent files into the video editing process but instead it flags the files. As a result, if you replace the file (while the software is closed) the graphic is updated (although there is some display lag if you re-opened NCH too quickly).
As a result, strictly manage the file names. Not only will this keep the software happy and it will also keep you sane!

Assembling the Rough Pieces
After exporting to video the rough cuts, they were imported into a new project and combined with the overlay graphics. Each section (scene, or sequence) included a one second pre/post title slide. The sections were then merged into the final version and music, title/final credits added plus any fine tweaking.
Vetting and Tweak Offers
I gave the presenters, panelists, and audience members a link to view the rough cut of the video and an offer to make the following changes:
- Changes to the overlay slides: modify, add, or remove a bullet.
- Within reason, I can also remove a section of the video. For example, if you want to be heard as being more precise and you thought you were repeating a comment, then we will set up a screen sharing session to do further edits.
- Adding additional video or audio is more problematic and I will apply an editorial prerogative that it really has to advance the narrative.
- To do so, you will need to dress in the same clothes, use the same room, computer, microphone, etc. so there is continuity.
- Nevertheless, if you really have a point you want to make, and it does not fit on an overlay, I will entertain it.
Publishing and Promoting
To date, I have only published my videos on a single the YEGVille.ca YouTube channel. WordPress.com (such as this site) allows YouTube videos to be embedded in posts. In this video’s case, it will appear on this site, YEGVille, SAPAA, and linked via other environmental organizations.
I wish I could compete with Taylor Swift, but I am not expecting more than a few dozen views over the next decade. If there will be so few views, why bother? Because the video advanced the body of knowledge on the subject. Hopefully, the video will help nonprofits.
Death March Alternatives
Using the (non) patented Tracking IPOOG Time, I spent 40 hours planning, organizing, and recruiting speakers for the webinar. Editing the video took another 50 hours of effort for a total of about 90 hours (to date).
In other words, running a simple production such as this webinar is a time intensive process for a quality product. A written summary is much less time intensive. A webinar in May on technology and nature took only 10 hours to write up (see: Notes – May 13 CoP of Organizational Stewards) and has had 40+ visits to date. Perhaps a reasonable alternative to the video editing death march…
